Secure Raspberry Pi Zero IP Camera
A Raspberry Pi Zero Wifi edition and a USB webcam are all you need to setup a simple IP camera accessible from anywhere on the internet securely over HTTPS.
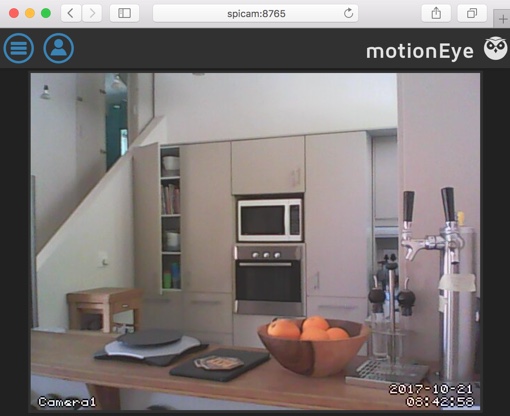
(Note the 2 beer taps, I have 6 more in the laundry!)
Parts list:
- Raspberry Pi Zero Wireless
- USB charger good for 140 mA (e.g. old iPhone charger)
- USB A male to USB micro B male 1.5m
- Logitech C170 Webcam
- SD Card
- USB A Female to Male micro B cable
These additional items are needed to setup the Pi:
You could use a Pi specific camera but the USB webcam works a lot better in low light. Any camera compatible with Video4Linux should work.
Install NOOBS and Enable SSH
Download NOOBS and follow the instructions to get your Pi up and running and on your Wifi network. I had to toggle between using the keyboard and mouse since the Pi Zero only has one USB port and I didn’t have a suitable hub. You should configure your Wifi router to give the Pi a fixed IP address as this will make connecting to it with ssh and remote access from the web possible.
If you the camera is going to be on a different Wifi network to the one you are currently using then you can add extra networks to /etc/wpa_supplicant/wpa_supplicant.conf:
network={
    ssid="YOURNETWORK"
    psk="password"
    key_mgmt=WPA-PSK
}

network={
    ssid="OTHERNETWORK"
    psk="verysecret"
    key_mgmt=WPA-PSK
}
Install MotionEye
MotionEye is a nice web frontend for the motion daemon. These instructions are based on install On raspbian and MotionEye issue #643.
$ sudo bash
$ wget https://github.com/ccrisan/motioneye/wiki/precompiled/ffmpeg_3.1.1-1_armhf.deb
$ dpkg -i ffmpeg_3.1.1-1_armhf.deb
$ apt-get install python-pip python-dev curl libssl-dev libcurl4-openssl-dev libjpeg-dev libpq5 libx264-148 libavformat57 libavcodec57 default-libmysqlclient-dev libswscale4
$ wget https://github.com/Motion-Project/motion/releases/download/release-4.0.1/pi_stretch_motion_4.0.1-1_armhf.deb
$ dpkg -i pi_stretch_motion_4.0.1-1_armhf.deb
$ pip install motioneye
$ mkdir -p /etc/motioneye
$ cd /etc/motioneye/
$ cp /usr/local/share/motioneye/extra/motioneye.conf.sample /etc/motioneye/motioneye.conf
$ mkdir -p /var/lib/motioneye
$ cp /usr/local/share/motioneye/extra/motioneye.systemd-unit-local /etc/systemd/system/motioneye.service
$ systemctl daemon-reload
$ systemctl enable motioneye
$ systemctl start motioneye
Now browse to http://(Pi IP address):8765/ and login as ‘admin’ with no password. Configure a password and add your camera.
Configure Dynamic DNS
Create a free account on Dynu.com. Go to “DDNS Services” in the control panel and add a domain. Now setup ddclient to keep your external IP address in sync:
$ sudo bash
$ apt-get install ddclient
The installer will ask you some questions. This is what my /etc/ddclient.conf looks like:
$ cat /etc/ddclient.conf
# Configuration file for ddclient generated by debconf
#
# /etc/ddclient.conf

protocol=dyndns2
use=web, web=checkip.dynu.com/, web-skip='IP Address'
server=api.dynu.com
login=yourlogin
password='secret'
yourddnshost.dynu.net
Restart ddclient to pickup changes:
$ service ddclient restart
Check that your external IP address is showing up in “DDNS Services” in the control panel. Now configure your router to forward port 80 to port 8765 and the IP address of the Pi.
You should now be able to get to the camera from outside your network using its DDNS domain name. If you are not concerned about random people in coffee shops being able to access your camera then you can skip the next section.
Configure HTTPS
The setup described above is simple but your username and password are transmitted over the internet in clear text when you login. So I would advise configuring HTTPS access. This involves installing nginx webserver, certbot to manage free certificates issued by Let’s Encrypt and configuring an nginx virtual host to proxy MotionEye.
Install nginx and certbot:
$ sudo bash
$ apt-get install nginx
$ apt-get install certbot
$ apt-get install python-certbot-nginx
Configure port forwarding on your router to forward port 80 and 443 to ports 80 and 443 on your Pi. You should be able to browse to your DDNS name and see the “Welcome to nginx!” default site.
Create virtual host for your site by placing a file with the same name as your DDNS name (e.g. example.com) in /etc/nginx/sites-available/:
server {
    listen 80;
    listen [::]:80;
    server_name example.com;
    root /var/www/example.com;
    index index.html;

    location / {
        try_files $uri $uri/ =404;
    }

    location /cams/ {
        proxy_pass http://127.0.0.1:8765/;
        proxy_read_timeout 120s;
        access_log off;
    }

    rewrite ^/$ $scheme://$host/cams/ redirect;
}
Replace example.com with your DDNS name. The “location /cams/” section proxies MotionEye.
Create your content root directory:
$ mkdir /var/www/example.com
Enable your new site by creating a symlink in /etc/nginx/sites-enabled:
$ cd /etc/nginx/sites-enabled
$ ln -s ../sites-available/example.com
$ service nginx restart
Make sure you can browse to your site using your DDNS domain and see the MotionEye login prompt.
Configure certbot and get a certificate:
$ sudo bash
$ certbot --nginx
Answer the prompts. Now you should be able to get to MotionEye securely e.g. https://example.com/cams/
You should remove the port 80 forwarding from your router configuration.
Finally setup a cron to renew your certificate before it expires:
$ sudo bash
$ crontab -e
Paste in the following line:
43 6 * * * certbot renew --post-hook "systemctl reload nginx"