Raspberry Pi Zero Automatic Pump with Node.js
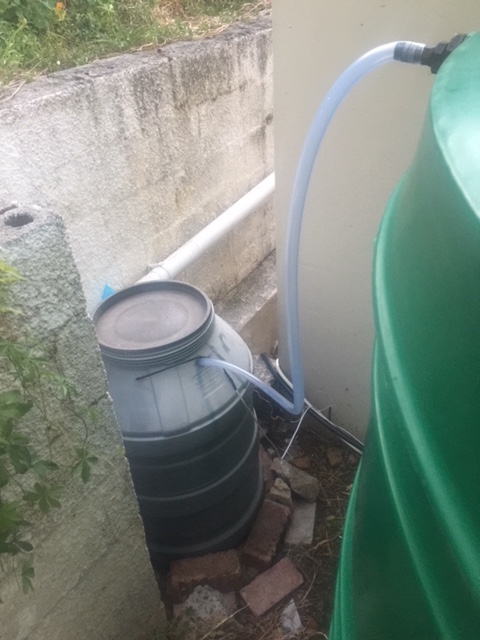
This project uses a Raspberry Pi Zero Wifi edition, water level sensor and relay to automatically pump water from a small collection barrel to a big storage barrel using a Node.js script.
Parts list:
- Raspberry Pi Zero Wireless
- USB charger good for 140 mA (e.g. old iPhone charger)
- USB A male to USB micro B male 1.5m
- SD Card
- Liquid Water level sensor Right Angle Float Switch
- 5V 1 Channel SSR 202P Solid State Relay Module
- Female to female jumpers
- 1k resistors
- 10k resistors
These additional items are needed to setup the Pi:
Please note that you need to get a solid state relay module that can switch enough current to turn on your pump. The 5V 1 Channel SSR 202P Solid State Relay Module is only rated for 2A. That was enough for the little pond pump I needed to control.
Install NOOBS and enable SSH
Download NOOBS and follow the instructions to get your Pi up and running and on your Wifi network. I had to toggle between using the keyboard and mouse since the Pi Zero only has one USB port and I didn’t have a suitable hub. You should configure your Wifi router to give the Pi a fixed IP address as this will make connecting to it with ssh possible.
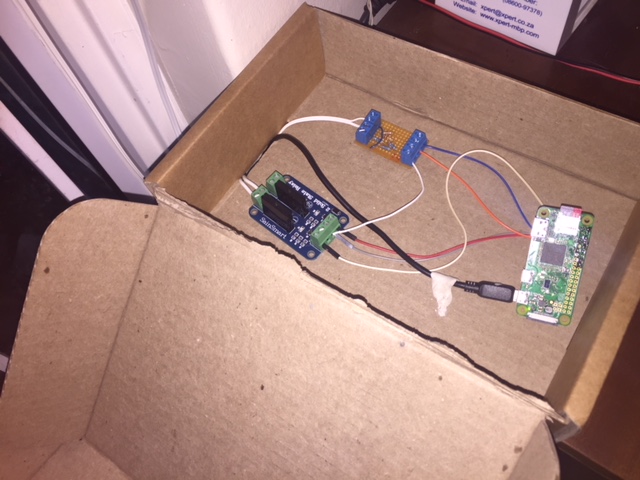
Connect the relay and pump to the Pi
Connect Pi pin 2 (5V) to relay VCC, Pi pin 6 (GND) to relay GND and Pi pin 11 (GPIO 17) to the relay input. Connect your pump to its power source via the load (output) side of the relay. Use the gpio utility to check that you can turn it on/off:
$ sudo bash
# gpio -g mode 17 out
# gpio -g write 17 1
# gpio -g write 17 0
For more information on switching AC loads with a Pi see Using the Raspberry Pi to control AC electric power.
Connect the water level sensor to the Pi
The safest way to connect a switch to a Pi GPIO input pin is to use a 10k pull up resistor to avoid spurious signals and a 1k resistor to limit the current should the GPIO pin be misconfigured as an output and set to 1. The circuit (from elinux.org):

Connect Pi pin 1 (3.3v) to the 10k resistor. Connect the one side of the switch to the other side of the 10k resistor. Connect Pi pin 14 (GND) to the other side of the switch. Connect Pi pin 7 (GPIO4) to the 1k resistor.
Check that the switch is working:
$ sudo bash
# gpio -g mode 4 in
# watch -d gpio readall
+-----+-----+---------+------+---+-Pi ZeroW-+---+------+---------+-----+-----+
| BCM | wPi |   Name  | Mode | V | Physical | V | Mode | Name    | wPi | BCM |
+-----+-----+---------+------+---+----++----+---+------+---------+-----+-----+
|   4 |   7 | GPIO. 7 |   IN | 1 |  7 || 8  | 0 | IN   | TxD     | 15  | 14  |
The V column for physical pin 7 should change from a 1 to a 0 when the switch is closed.
Install Node.js
The Node.js packages installed by apt-get are a bit old. I used one of sdesalas’s scripts instead:
$ sudo bash
# wget -O - https://raw.githubusercontent.com/sdesalas/node-pi-zero/master/install-node-v8.9.0.sh | bash
The Pumpomatic Script
The script uses onoff a nicely done Node.js library to monitor the state of the water level switch and turn the pump on and off. Put pumpomatic.js and package.json into a /home/pi/pumpomatic/ directory on your Pi:
const Gpio = require('onoff').Gpio;

const pump = new Gpio(17, 'out');
const waterLevelSwitch = new Gpio(4, 'in', 'both');

let timeout;

console.log("Watching water level switch");

waterLevelSwitch.watch((err, value) => {
    console.log("Water level switch pin change " + value);
    if (value) {
        console.log("Turning pump off after 30m delay");
        if (timeout) clearTimeout(timeout);
        timeout = setTimeout(() => pump.writeSync(0), 30 * 60 * 1000)
    } else {    // switch is closed i.e. barrel is full
        console.log("Turning pump on");
        pump.writeSync(1);
    }
});
Now install the script dependencies and run it:
$ cd pumpomatic
$ npm install
$ node pumpomatic.js
Install PM2 for Management Of Node.js Scripts
PM2 is a utility to run Node.js scripts on boot and keep them running. Follow the instructions on the site to install and generate a startup script.
$ sudo npm install pm2 -g
If pm2 isn’t on your path after the install create a symlink to it:
$ sudo bash
$ cd /usr/local/bin
$ ln -s /opt/nodejs/bin/pm2
Then you can use PM2 to ensure that the pumpomatic script is always running:
$ cd pumpomatic
$ pm2 start pumpomatic.js
$ pm2 save